Home/ Blog Details
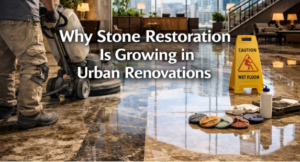
How to Maintain Travertine After Professional Restoration
26 September, 2025
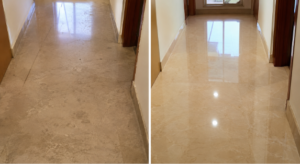
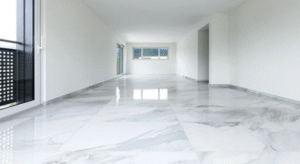
Travertine stone has a unique charm, admired for its natural patterns and luxurious feel underfoot. When installed in homes or businesses, it elevates the overall look and adds long-lasting value to the property. However, like all natural stones, travertine is vulnerable to scratches, stains, etching, and dullness over time. Professional travertine stone restoration—whether it involves polishing, honing, or sealing—helps breathe new life into worn surfaces, making them look as good as new. But the real secret to keeping travertine beautiful lies in how you maintain it after restoration. Without proper care, the same problems can resurface, leading to costly repeat services.
In this comprehensive guide, we’ll explore detailed steps you can take to protect your investment in travertine floor restoration or travertine tile restoration. Each section dives deeper into everyday maintenance practices, long-term strategies, and smart preventive measures to ensure that your travertine floor cleaning and restoration efforts last for years to come.
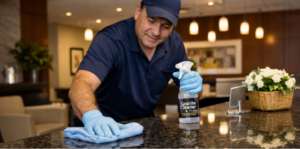
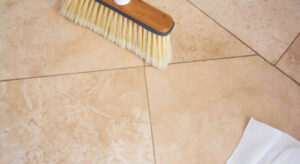
1. Clean Your Travertine Floors the Right Way
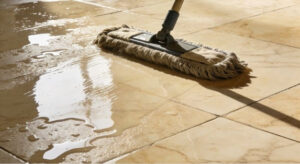
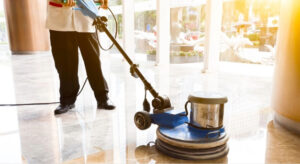
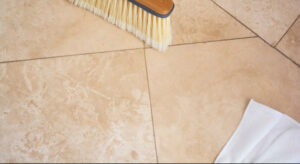
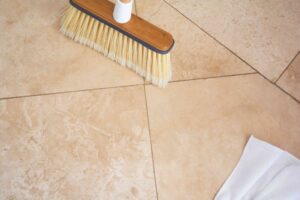
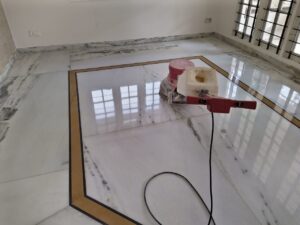
Once professional travertine floor restoration is complete, the first and most important habit to develop is proper cleaning. Many homeowners unintentionally damage their stone by using the wrong products or tools. For instance, acidic cleaners containing vinegar, lemon juice, or bleach may seem effective at cutting through dirt, but they etch the delicate surface of travertine, leaving dull marks and uneven patches. Similarly, abrasive pads or scrubbers may scratch and strip the shine, undoing the results of your travertine tile restoration. The key is to stick with a gentle, consistent cleaning routine. Daily or every-other-day dust mopping with a soft microfiber mop helps prevent grit and dirt from scratching the stone. For deeper cleaning, always use a pH-neutral cleaner specifically formulated for natural stone. These cleaners not only remove dirt but also preserve the sealer applied during restoration. Mixing warm water with a stone-safe cleaning solution is usually sufficient for everyday care. Additionally, avoid letting dust and spills sit on the surface for long. Even water can leave mineral deposits if left to dry. Wipe down spills quickly using a soft, damp cloth, and follow up with a dry wipe to prevent streaks. With these habits, your newly restored travertine will retain its fresh, polished look far longer.2. Reseal Your Travertine Regularly
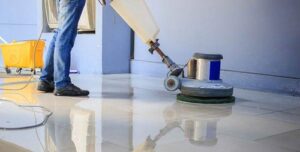
One of the critical steps in travertine stone restoration is sealing. Professionals typically apply a penetrating sealer that helps shield the porous surface from stains and moisture. However, sealing is not permanent. Depending on foot traffic, exposure, and usage, the protective layer can wear off within a year or two. If resealing is ignored, your restored travertine may quickly start absorbing spills and dirt again, negating the benefits of travertine floor restoration. To maintain the beauty of your travertine, plan to reseal it regularly. A good rule of thumb is to test the stone’s absorption. Place a few drops of water on the surface—if the water beads up, your seal is intact. If it soaks in quickly and darkens the stone, it’s time to reseal. For high-traffic areas like kitchens or hallways, resealing may be required annually, while less-used spaces might only need it every two to three years. When resealing, always use products recommended for travertine. Penetrating sealers work best because they seep into the stone without leaving a glossy, artificial film. The right sealer not only enhances durability but also maintains the natural, matte-to-polished finish achieved through travertine tile restoration. By making resealing part of your maintenance routine, you extend the lifespan of your floors and reduce the risk of permanent stains, etching, and water damage. Consider resealing as an ongoing partnership between you and your stone—professional travertine floor cleaning and restoration handle the heavy lifting, while resealing ensures lasting protection.3. Address Spills Immediately
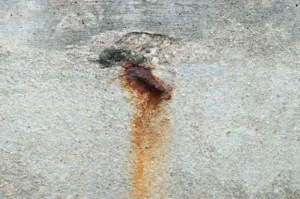
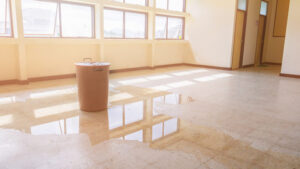
Travertine is naturally porous, meaning it quickly absorbs liquids if left unattended. After investing in travertine floor restoration, one of the simplest yet most effective habits you can adopt is immediate spill management. Spills, especially those involving acidic or dark-colored substances, can penetrate the surface within minutes, causing discoloration and etching that can only be fixed with professional travertine tile restoration. For everyday spills like juice, wine, coffee, or sauces, the best method is to blot, not wipe. Wiping spreads the liquid across a larger surface area, increasing the risk of staining. Use a soft cloth or paper towel to gently blot the liquid until fully absorbed. Then, clean the area with a damp cloth and a stone-safe cleaner. Finally, dry the surface to prevent streaks or water spots. Even water should not be ignored. Hard water can leave behind mineral deposits that dull the surface, while standing water may seep through and weaken the sealer. Pet accidents, oils, and cosmetics are other common culprits that can leave stubborn marks if not addressed immediately. Making spill management a household habit pays off in the long run. Encourage family members and guests to be mindful of the stone surfaces, and keep a cleaning kit handy in high-risk areas like the kitchen or dining room. By handling spills promptly, you not only preserve the beauty of your travertine stone restoration but also reduce the need for frequent travertine floor cleaning.4. Use Rugs, Mats, and Furniture Pads
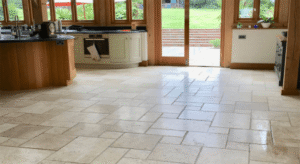
Preventive care is one of the most underrated yet powerful strategies for maintaining travertine after professional restoration. Once your travertine floor restoration is complete, think of it as a fresh start—you’ll want to protect the surface from high traffic, heavy furniture, and other sources of wear. Simple tools like rugs, mats, and furniture pads can dramatically reduce the chances of damage. Placing rugs or mats in entryways, kitchens, and hallways helps capture dirt and grit before it reaches the stone. This is especially important because tiny sand particles can act like sandpaper, scratching the surface and dulling the polished finish achieved through travertine tile restoration. Choose rugs with non-slip backings that won’t scratch the stone, and clean them regularly to prevent dirt buildup. Furniture pads are another must-have. Heavy furniture like sofas, chairs, or tables can leave dents or scratches if dragged across the floor. By attaching felt or rubber pads under furniture legs, you create a protective buffer between the stone and potential damage. These pads are inexpensive and easy to replace but save you from costly travertine stone restoration in the future. Beyond rugs and pads, consider setting rules like no shoes indoors or using slippers instead of hard-soled footwear. These habits minimize grit and scuff marks, extending the life of your restored travertine. Preventive care may seem small compared to professional travertine floor cleaning, but it plays a huge role in maintaining long-term elegance.5. Avoid DIY Polishing or Harsh Scrubbing
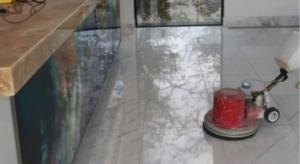
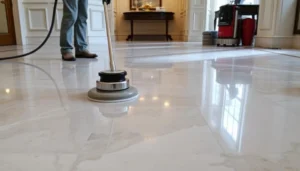
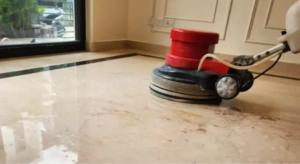
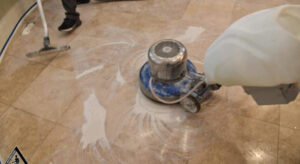
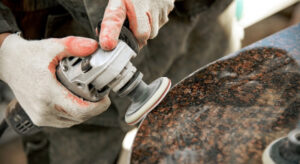
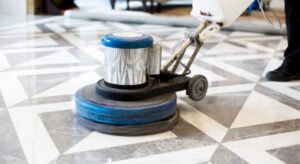
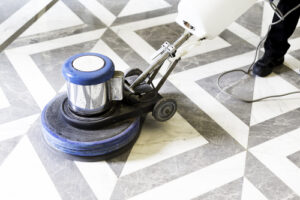
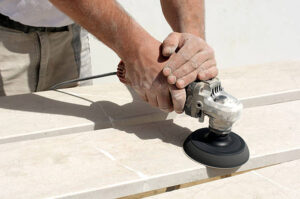
After professional travertine tile restoration, many homeowners are tempted to maintain the shine by using DIY polishing agents or aggressive cleaning techniques. Unfortunately, these efforts often cause more harm than good. Commercial floor waxes, for example, may look shiny initially, but they create a film that attracts dirt and discolors over time. Similarly, abrasive scrubbing pads or harsh cleaners strip the sealer and scratch the stone, leading to dullness and uneven finishes. The best way to maintain the results of your travertine floor restoration is to stick with gentle, consistent cleaning and leave polishing to the experts. Professionals use specialized equipment and polishing compounds tailored to travertine’s unique properties. Attempting to replicate this at home can lead to costly damage that requires another round of travertine stone restoration. Instead, focus on preserving the shine with proper care. Dust mop regularly, clean with stone-safe products, and avoid shortcuts like vinegar or ammonia-based solutions. For stubborn stains, consult a professional rather than experimenting with DIY remedies that may worsen the problem. Remember, restoration is not just about appearance—it also strengthens the stone’s resilience. By avoiding DIY mistakes, you protect the integrity of your surfaces and maximize the lifespan of your travertine floor cleaning and restoration investment.6. Schedule Periodic Professional Maintenance
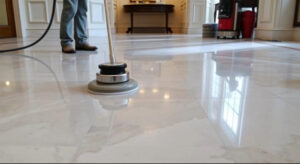
No matter how diligent you are with daily and weekly care, travertine floors will eventually need periodic professional attention. After a certain amount of time, dirt, scratches, and general wear accumulate to the point where only experts can fully restore the stone’s natural beauty. Scheduling professional maintenance every 2–3 years ensures that your investment in travertine floor restoration continues to pay off. Professional services go beyond simple travertine floor cleaning. They often include deep cleaning, resealing, honing, and polishing to refresh the surface and address issues like etching, dullness, or minor cracks. This kind of care acts like a tune-up for your floors, keeping them in top shape while extending their lifespan. Additionally, professionals can spot early signs of damage that may escape your notice. Cracks, grout issues, or uneven wear can be addressed before they become major, expensive repairs. Think of professional maintenance as a proactive step rather than a reactive one—it saves money in the long run and preserves your travertine’s luxurious look. By combining daily cleaning habits, periodic resealing, and professional maintenance, you create a foolproof system for keeping your travertine tile restoration results intact. This layered approach ensures that your floors stay stunning and durable for decades.Conclusion
Investing in travertine stone restoration is only the first step toward enjoying elegant, long-lasting natural stone surfaces. The real work begins after the restoration is complete. From proper travertine floor cleaning and immediate spill management to resealing, using rugs, and scheduling professional check-ups, every step contributes to the stone’s longevity. Avoiding DIY polishing and harsh chemicals further safeguards your surfaces, ensuring that your investment in travertine floor restoration or travertine tile restoration remains worthwhile. With the right care, your travertine floors and tiles will continue to shine with the same beauty and sophistication that drew you to them in the first place.- granite restoration
- Marble Cleaning
- Stone Restoration
- Travertine Discolouration
- travertine floor